| Vol 3 - Issue 1 | September 1998 |


|
Installing a Spinnaker When there is no wind, work on the boat By Roy Tally |
|
David Hendricks and I took off the other day to do the next best thing
to sailing - mucking about with the boat. For those who don't know us,
we recently got acquainted through the Internet. We both live in St.
Paul, Minnesota, just a few miles from each other, a couple of graying
but enthusiastic single handers. We have decided to sail as a team
when schedules permit and have already enjoyed a number of outings this
spring. We both live in St. Paul, Minnesota.
David has been itching to install a spinnaker rig on his H16 for months, but was leery about drilling holes in a $1500 mast all by himself. So, along comes yours truly |
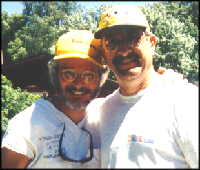 David Hendrick and Roy Tally (L to R) aka Mutt & Jeff, The Nut Brothers Ches and Wall, The Terror of C Fleet |
|
with a "devil may care, Hey, its
not my boat" attitude. He has everything for the task, two battery
powered hand drills, bits, drivers, spare rivets, a new Murray's rivet
tool, not to mention the complete spinnaker kit with enough swivel
blocks, line and miscellaneous stuff to make any gadget freak drool. I
supplied the beer, a premium brand fitting the importance of the
occasion. Always use the right lubricant.
We got started about 10:30. David had it in mind that this would be a two hour project. We got done at 4:30. This is about what I expected, given my track record with various home and boat projects. The first step was to mount the rudder gudgeon on the front of the mast step. This is not a precision operation, and, good thing as we worried the tired old drill bit into the casting. We didn't drill the hole as much as we pushed the extra aluminum aside to make room for the rivet. I didn't say anything but I wondered if all of the drill bits were as bad as this one. Once the lower two holes were drilled we applied our combined strength to the Murray's riveting tool. Ooof, grunt, POW! That's one, only fifteen to go. Shortly, we had the gudgeon mounted and were trying on the previously assembled spinnaker pole. Time for the first beer. The spinnaker pole is guyed to the bridal wire tangs on each hull. I provided a temporary belay on the mast using the jib halyard while David gingerly removed first one bow tang, inserted the guy wire and reattached the tang. The other went on without a problem and the pole was soon gracing the bow. We pondered the idea of a figurehead for the new bowsprit. No, not today. We were then ready to drop the mast and attach the new tang. No problem, I said as one who does this every time I sail. David never ceases to be amazed by the utility of brute strength in dealing with the H16 mast. Just don't forget the step link. (We didn't.) We positioned ourselves to drill the holes for the new mast tang. It is located 20" above the main tang, in the CompTip. The holes went in easily and we were careful to line everything up right. We smeared marine grade silicon on rivet cones, rivets, tang, mast and ourselves and popped the first rivet. It was a dud and did not pull down as tight as we wanted. Nothing to do but put in more rivets and pray. Prayers answered, the rest of the rivets pulled down tight and uniform. Seven out of eight isn't bad, especially when the instructions only call for six rivets. We perfectionists don't do things by halves. Time for another beer. Proud as punch of our new tang, we attached the block, threaded the halyard and raised the mast. Mercy! There's 200 feet of halyard here! We threaded the out haul (more line!) and laced everything together. What a contraption. The spinnaker rig calls for two ratchet blocks on the outboard edge of the rails at the stern. What could be simpler than a couple of pad eyes and their companion rivets? For some reason, the rivet tool chose to hang up on a partially pulled rivet, leaving us, literally, between the rail and a hard spot. Out came the hacksaw and we chewed our way through the faulty rivet. It took two more rivets, all of David's spares, to finish those blasted pad eyes. We found that you can adjust this particular rivet tool and even change the jaws inside the chuck after we struggled with the reluctant rivet. It seems that the pop rivet learning curve just fits the number of rivets you have to pull, plus one. We were lucky to have a few extras. |
|
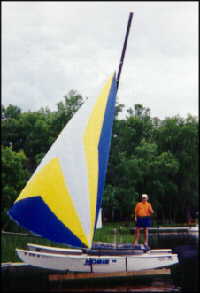
Now for the long awaited moment, the spinnaker came out of its bag and
we distinguished head from tack and clew. We attached the halyard to
head, outhaul to tack and hoisted away. Glorious! Then, we attached
the colorful blue sheet to the clew, led it through the new ratchet
blocks at the stern and around the boat back to the clew again. A light
breeze filled the sail, ballooning it just enough to see the
effect. Beautiful! Out came the camera and we documented the moment
for posterity. The boat had been properly up and out of the water on
its dockside stand for the entire operation, but we were booming along
with spinnaker flying in our minds' eye.
We struck the sail, put everything in order and started some bratwursts on the grill. You do not do anything in |
|
Wisconsin without searing a
ceremonial bratwurst. We were full of pride and self congratulation.
It was a Hobie day.
|
|
Roy Tally Roy.Tally@state.mn.us H16 "Felix" Back to Features |