Hi all,
I was recently gifted a @ 1987 Hobie 16. I then bought a damaged 1984 Hobie 16 for $250 mainly for the trailer but also for parts.
I got the boats home and stripped the damaged boat down and cleaned up the '87. Now I can see that all four of the hulls are in poor condition with many repairs already visible, and a good number still necessary. Call me crazy, or masochistic, or just plain dumb... but I'm thinking of fixing up these hulls.
Full disclaimer, I have little idea what I am doing. Aside from a very small amount of fiberglass work, my only "experience" is YouTube videos. But I'm industrious I have the work space and I can make the time.
Photos Here: http://www.thebeachcats.c…ictures?g2_itemId=119192
I suppose one option would be to do a 'fast and dirty repair' (like most of the work previously done on these hulls), maybe hit 'em with a fresh coat of paint and call it a beater boat.
Another option might be to repair the hole(s) clean up some of the past patch jobs a little, and then paint it resulting in a somewhat masked finish.
What I'd like to do, but am not sure is possible, is to completely restore the hulls to a like new finish. Possible with a new color.
Your thoughts, opinions, advise, slander are freely sought here. Many thanks in advance!
Hobie 16 Restoration
-
- Rank: Lubber
- Registered: Jul 12, 2015
- Last visit: Jul 18, 2015
- Posts: 4
-
- Rank: Mate
- Registered: Aug 28, 2010
- Last visit: Jul 19, 2016
- Posts: 108
More importantly, are the decks delaminated? If the decks are de-lammed nothing else matters, the design of the H16 requires a massively stiff deck section. Lots of stuff on this board about deck reconstruction but IMO not worth the risk. Start with a thorough inspection of the decks. If the decks are shot the hulls are shot.
--
'life is too short to drink cheap beer'
-- -
- Rank: Mate
- Registered: Mar 19, 2004
- Last visit: Nov 21, 2024
- Posts: 964
+1
First things first, neither of those boats is an '87. You can tell by the hull graphics. The yellow boat is likely an early '80's boat, maybe an '82. The red boat, who knows, but it's really rough. You should be able to tell the year of the hulls from the last two digits of the HIN located on the transom.
The yellow hulled boat looks to potentially be in decent condition, but as mentioned above, delamination is everything with an older boat. Use your palm to press on the hulls all over. If you get excessive deflection or hear a crunching sound, the hull is delaminating. This is a major structural issue and needs to be addressed before you spend any other time working on the hulls. Research delam repair. It involves drilling holes into the hull and injecting epoxy resin. If there are only small areas of delam, it may be worth repairing. If the areas are larger than about 10" in diameter, then it is a sign that the entire hull is coming apart and probably not worth the time/expense of repair because you will likely just continue to see more spots develop.
Otherwise, the yellow hulls don't look that bad (relatively speaking). I would steer clear of painting or re-gelcoating the hulls. It's a lot of work and you may end up with mixed results. Not to mention that painting/gelcoating the decks results in the nonskid area being filled in. I would strip off all the hull striping, fix any structural issues, fill in chips with yellow gelcoat, and then wet sand and polish the heck out of the hulls. You will be amazed at how you can restore old gelcoat just by using the correct polishes, waxes, and lots of elbow grease.
sm -
- Rank: Lubber
- Registered: Jul 12, 2015
- Last visit: Jul 18, 2015
- Posts: 4
Thanks for your responses!
You have a good eye Dogboy! The yellow hull HIN ends in ...M82J. If I read that correctly it was built May of 1982. The red hull HIN, however, is confusing me because it doesn't seem to match the format. It ends with ...00874.
One yellow hull does have a soft spot in the deck just fore of the trampoline on the starboard side. It seems to be about 8" in diameter and has about 1mm, maybe 2mm give. There is no crackling noise. IMO, it doesn't seem bad. It transitions fairly smoothly from soft to hard in a short distance. I have not noticed any other hard spots in the deck, but will now triple check and with more vigor than before. I will also check the sides of the hulls for crunching noises. The red hulls do not have any soft spots in the deck that I have noticed. -
- Rank: Lubber
- Registered: Jul 12, 2015
- Last visit: Jul 18, 2015
- Posts: 4
On further inspection I agree with my statement above. The soft spot is a little less than 8". Closer to 6". Pressing on it pretty good did result in a couple of faint crunches. But that stopped after a few crunches and didn't return. I noted that I think I might feel the separation at the center of this circular spot. Perhaps an area 2" - 3" in diameter. The more I pressed the more I felt this. The separation did not feel like it was spreading as I was pressing around the area, though.
No other soft spots or any crunching in the deck. No no soft spots or crunching to speak of on the red decks.
So I guess I have some more research to do and then a decision to make. -
- Rank: Lubber
- Registered: Apr 24, 2014
- Last visit: Apr 09, 2017
- Posts: 98
That's probably one of the worst places to have delam. The greatest forces on the hull are right in that area. I'd highly recommend fixing it before sailing, or finding another hull. Having the hull snap off just forward of the tramp frame would make for a bad day.
--
Tim
81 Hobie 16
87 Nacra 5.7
Austin, TX
-- -
- Rank: Mate
- Registered: Mar 19, 2004
- Last visit: Nov 21, 2024
- Posts: 964
You need to fix that soft spot, no matter how small. It is in the worst possible place for delamination and it will not fix itself - it will just continue to grow until the hull eventually fails. The fix is easy and if done properly, will greatly extend the life of the hull.
sm -
- Rank: Lubber
- Registered: Jul 12, 2015
- Last visit: Jul 18, 2015
- Posts: 4
Thanks again for the helpful comments!
Point taken regarding the soft spot. In searching around this site, the Hobie forums, and YouTube (so far) I have found a number of great resources for general glass work and soft spot repair. I have read a number of people express real concern, though, about repaired soft spots.
It seams to my inspection that this soft spot is in the top layers of the deck and that there is still firm material underneath the soft spot. This encourages me. It is, however, only @ 10" in front of the fore tramp pylon. This concerns me. And then there is the concern of further delamination that I cannot see...
I'll continue reading up. If anyone can suggest reading as to the longevity of soft spot repairs, I'd be interested.
...Perhaps I'm overthinking it all and I should just do the repair and have some fun. It's not like I signing up for league racing. Heck, i don't even really know how to sail yet. But, i really don't want to be sinking in the middle of the lake with my wife and kids.
When I get to work, I'll post back here. Thanks again all! -
- Rank: Lubber
- Registered: Jul 29, 2019
- Last visit: Jul 30, 2019
- Posts: 3
So - Winded - it's been four years - I just got given a nearly mint condition H16 - with only ONE issue - 10" delam spot in front of starboard tramp post. I already own a Prindle 16 I've sailed for years, and last year finished a two and half year long ground up total rebuild and refit (LED lights, solar, new cushions, hull repairs/paint, deck repairs/paint, new outboard, redid ALL interior and exterior teak, had mainsail cleaned and repaired, new port windows, rebuilt all winches, rewired mast and lighting, rewired entire boat) of a Columbia 26 I've sailed since 1987. So I can do fiberglass - just never had to mess with delamination amazingly enough. The Columbia is built like a tank. Just wondering what you did? -
- Rank: Master Chief
- Registered: Jun 20, 2006
- Last visit: Dec 04, 2024
- Posts: 7090
winded is gone and never came back after the first week he posted here (or at least never posted again)
you have a few choices for your hobie
repair the delam or get a new (replacement) hull (as mentioned above that is a bad spot and can lead to ... bad things)
the standard method of dealing with hobie delam issues is to drill lots of small holes in the deck / only through the top and not through the hull and use a syringe to inject thickened epoxy (or similar)
you can search this site for more specifics but that is the basics of it
or you can probably find another crapped out hobie for cheap (just find one with a good starboard hull) and swap hulls -
- Rank: Lubber
- Registered: Jul 29, 2019
- Last visit: Jul 30, 2019
- Posts: 3
So - Winded - it's been four years - I just got given a nearly mint condition H16 - with only ONE issue - 10" delam spot in front of starboard tramp post. I already own a Prindle 16 I've sailed for years, and last year finished a two and half year long ground up total rebuild and refit (LED lights, solar, new cushions, hull repairs/paint, deck repairs/paint, new outboard, redid ALL interior and exterior teak, had mainsail cleaned and repaired, new port windows, rebuilt all winches, rewired mast and lighting, rewired entire boat) of a Columbia 26 I've sailed since 1987. So I can do fiberglass - just never had to mess with delamination amazingly enough. The Columbia is built like a tank. Just wondering what you did? -
- Rank: Lubber
- Registered: Jul 29, 2019
- Last visit: Jul 30, 2019
- Posts: 3
lol - so maybe winded didn't take anyone's advice and that Hobie is hanging with old Davy Jones now. I think I'll break out my West Epoxy and drill that spot and make sure it dries out. How thick is the top plate on these Hobie 16's? Is it fiberglass on top and bottom with - what - layer of balsa or what - marine grade plywood inbetween? I need to go out to the marina and check on my big boat - been too hot for the last month- I'll poke around the boat graveyard to see if I can find a good hull. This one is white - which I imagine is the most popular. Sail on this boat are in MINT condition though.
So another question - some of the little blocks have plastic rollers that are toast - and unfortunately every thing is put together using rivets - I thought I would just drill them out and replace the rollers - or I suppose eBay. Is there other good sources of spare parts? Obviously I'll be checking classifieds on this website too! I'll post a before and after photo of the boat, it already cleaned up extremely well. On the big boat I repainted the decks, but on the Hobie it looks pretty good - so I'm thinking waxing - I'll cruise the posts but if you have a favorite method let me know! THanks! I look forward to being a new Hobie convert! I would LOVE to be getting the larger ones - but I kind of wanted the smaller one because I'm older and I think I might be able to right this one more easily - not sure I could get a 17,18 or Pacific up anymore. -
- Rank: Master Chief
- Registered: Jun 20, 2006
- Last visit: Dec 04, 2024
- Posts: 7090
not thick at all - i don't have a measurement
in the middle is foam
https://www.youtube.com/watch?v=nmDWt8kiZ4I
IMHO: don't waste your time replacing sheeve's- just drill out the rivets and purchaser a new blocks (otherwise you will need to find a way to secure the new sheeve - more work than it's worth to me
but if you insist ... Murrays.com, apsltd.com, etc -
- Rank: Mate
- Registered: Mar 19, 2004
- Last visit: Nov 21, 2024
- Posts: 964
The top skin of the deck is 1/8” thick max. The foam core is roughly 3/8” thick. Then the inner layer is only a few plies of glass, 1/16” thick or less. My recommendation when drilling the deck for injection, put a stop or at the very least, a piece of masking tape on your drill bit to limit the depth to 1/4” so you only go thru the outer glass layer. It is very easy to punch all the way thru the deck with a power drill and then you just gave yourself a big headache since you will have to plug that hole before injecting or all the resin will just drop down into the hull.
After you drill all your initial 1/4” deep holes, remove the stop from the bit and take the bit out of the drill. Then just put the bit into the hole and spin it by hand (with your fingers) so the hole goes down to the inner layer of glass but not thru. Suck all the foam bits out of the holes with a shop vac.
I also recommend masking off the entire are that you are injecting before drilling the holes. This will give you a surface to mark out before you start drilling and it will also prevent epoxy from getting all over the deck and into the nonskid.
sm -
- Rank: Online Pioneer
- Registered: Apr 23, 2002
- Last visit: Feb 18, 2022
- Posts: 211
Regarding delamination repair, for what it is worth, I fixed an area with the epoxy injection method for an area far, far larger than recommended for this type of repair. I'm talking like 2 square ft. It was a "make or break". If it didn't work, I'd tow the boat to the dump. As it is, after the repair I sailed the boat for over 12 years. Granted, this area is not as structurally critical as forward of the beam, but it felt rock solid when I was done with it.
I think I was going to right an article on this, because I found a bunch of photos, but apparently never got around to it. Basically, you mask the area, have small bits of tape at the ready, then start injecting. As epoxy emerges from the other holes, cover them with tape. Work in a pattern that assures complete penetration between the holes.
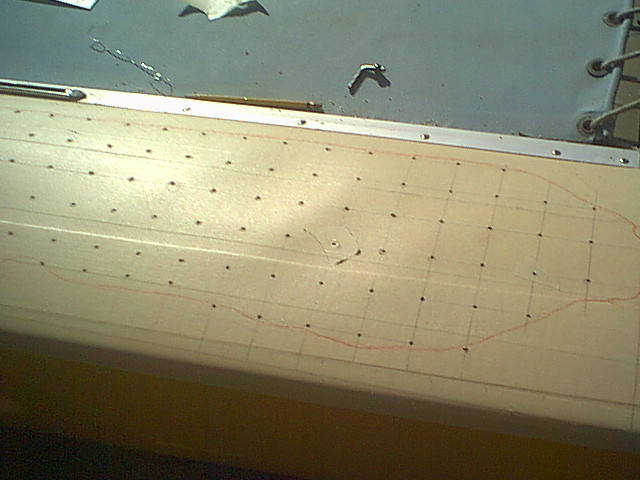
Photos of the job are below:
Note that I did have some smaller areas start to delam over the years and repaired them. I ultimately did end up replacing the hulls. But again, that was over a decade of sailing the repaired boat very hard, including channel crossings to the channel islands.
--
Bill Mattson
Prindle 19 "Gelli Bean"
Prindle 19 "Cat's Pajamas"
Nacra 5.2 (Will sail her a bit and let her name herself)
-- -
- Rank: Mate
- Registered: Jul 06, 2009
- Last visit: Nov 01, 2024
- Posts: 395
I just picked up an H16 1976 model purely for the sail box on the trailer (that's how cheap this was). After getting it home and taking stock I find that the sails are in great shape. It needs all new lines ($120) and a tramp ($220). The killer is that the starboard pontoon has ~40-50% delamination, but no damage. This includes the entire deck in front of the forward beam and several places on the hull. I hate to see a boat die, but I am not going to buy 6 gallons of resin to fix it. How much resin are we talking about here? I plan to just turn around and sell it, but I hate selling junk. Thanks.
--
FYC, Nacra 5.2 "Chris's Flyer" & Nacra Playcat & Farrier Tramp
Previously owned: Trac 14, H14, H16, H18, N5.0, G-cat 5.0
-- -
- Rank: Online Pioneer
- Registered: Apr 23, 2002
- Last visit: Feb 18, 2022
- Posts: 211
Years ago, I repaired a very large area of delamination on a Hobie 18 that I picked up for $100. I was going to do a write up on it, but never got around to that. I did take photos of each step however. You'll find them here:
http://www.catsail.com/projects/delam/
This was a significant area of hull, spanning practically the entire width of the deck from the daggerboard well to the rear crossbar. The only reason I went ahead with it was that this is not as structurally important an area as other areas on the boat, such as the bows where your damage is. Also, the boat was so cheap I had nothing to lose. I did find a smaller issue in the area you describe (a couple inches in diameter) and an even smaller area on one of the bows, and fixed those too.
One issue with the large area is that the repair took so much epoxy, it generated a significant amount of heat. It could not be touched, and I contemplated whether it would ignite. In the end, the repair worked but the hull surface was warped, presumably from the heat.
I sailed that boat for over 12 years, including channel crossings. But I did have some further delam in smaller areas that I repaired a couple more times. At some point, I decided it was getting to be too much and replaced the hulls with some free ones that came up.
Bottom line: Delamination is the beginning of the end. You may be able to get some years of sailing out of the boat, but it is something you'll need to stay on top of. And, as stated by others, that's a very critical area of your boat. I would not be surprised if you never had a problem with the repair, but I also would not be at all surprised if it failed on you.
Edited by mattson on Mar 13, 2020 - 01:53 PM.
--
Bill Mattson
Prindle 19 "Gelli Bean"
Prindle 19 "Cat's Pajamas"
Nacra 5.2 (Will sail her a bit and let her name herself)
-- -
- Rank: Mate
- Registered: Jul 06, 2009
- Last visit: Nov 01, 2024
- Posts: 395
Thanks Mattson, I found your post earlier today. I have some raka epoxy with a slow hardener. I use it up on the bad hull and see what progress is made. I am going to focus on the deck since they are in compression load. Should make it mildly safe. Pictures to come.
--
FYC, Nacra 5.2 "Chris's Flyer" & Nacra Playcat & Farrier Tramp
Previously owned: Trac 14, H14, H16, H18, N5.0, G-cat 5.0
-- -
- Rank: Lubber
- Registered: Nov 23, 2019
- Last visit: Jul 13, 2022
- Posts: 34
rch701, to elaborate on what Mattson is describing; when working with resin and bonding, you want a clean (no dust, mold, or moisture) surface that you can sand and clean with solvent. When the laminate or core has failed the inner and outer hull skins have separated. If you want a structural repair, these 2 skins must be prepared for bonding and clamped together while the resin is bonding the clean surfaces together. When laminating resin gets over 1/16 thick it's structural properties drop and it cracks under load. You also have bulging skins in this case that cannot take the compression load resulting from the front bridle. If this were a gem, the proper repair method is to grind away the outer skin and damage down to the inner skin and build everything back up. This is the only confident repair you could do to sell the boat and know you have repaired the hull and it will not break here. I recognize these methods may not be worthwhile on this old boat. When you use so much resin in the drill and fill that it exotherms (heats up), this has overheated the original structure (especially if there is core) and further weakened the hull. I'm re-iterating Mattson's bottom line. The end is near and getting closer when the drill comes out.
Good Luck
--
David
Inter 20
Southern Maine
-- -
- Rank: Lubber
- Registered: Mar 25, 2002
- Last visit: Jan 01, 2023
- Posts: 21
Hey Bill!
I picked up a H18 a few months ago with a similar delamination.
Both hulls forward and aft of the rear crossbar.
Hoping to tackle the project in a month or so.
--
Todd Elozory
H18
H21SE
Hobie Mirage Tandem Island
Catalina 22
Thonotosassa, Florida
--
Users on-line
This list is based on users active over the last 60 minutes.