

Does anyone in NSW/Sydney know where I can get marine ply scarfed at.
The Person I went to at first has decided to get out of joinery.
Regards
William
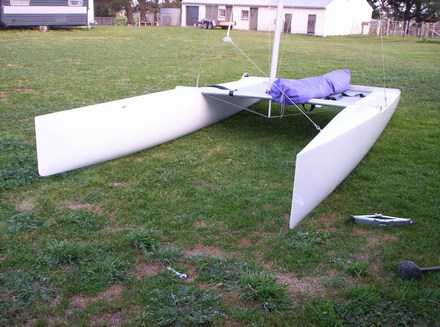
Where your getting the ply from? If not theres sure to be some boatbuilders in Sydney that work with timber. If you've got a router theres a couple of easy ways to do it. Have you googled scarfing, theres heaps of jigs you can make from all different tools, routers, circular saws and by hand of course.
If you get your sheets scarfed by someone else, they'll probably want to join it to, because they prefer not to risk the damage that can happen when moving it from a to b.
Regards
Ive picked up the ply from a place in richmond out west.Ive looked up google and it didnt come up with anything and I wouldnt mind the pple scarfing the wood to join it.
I just dont want to do this part cause I rather get someone with a bit of experience to do it(just in case the boat decides to split while out there <img src=

alt=
/>)

the scarf joints in my boat were done at home using a hand plane and cleaned up with a sanding block, using a technique found on the internet, Google - Brian dixon's Easy Plywood scarf bevel cutting technique.
use west resin to glue, i sat mine on the floor of the shed with polystyrene under it to stop it getting cold from the concrete.
my hulls use a hull doubler that covers the main scarf joint at the main beam, as used in the origina plans and the Ken Lott plans.

Scarffings not that bad - we just use a combination of a hand plane and belt/disk sander, and the job is pretty good. You don't need to aim for perfection - the epoxy is going to cope with gaps pretty well. Other builders reckon that a butt joint is ok, but I disagree, and I wouldn't use one on a mozzie, but finger joints aren't too hard to set up (with the right jig) and seem to be getting popular (although that may be down to the prevalance of CNC produce kits).
However, I spotted this scarfing jig the other day:
http:/
and was thinking of giving it a shot on the weekend.
Hi Bilby
I actually made that one, but I didn't really have a decent blade in the saw, and the scraps I used I wasn't happy with, so next time I would buy a new blade, very sharp and I suppose you'd want one with more teeth than less.
In the end, I fixed my router on it sides onto this jig, with the cutter sticking out basically where the saw blade is, I could only do one sheet at a time, and just ran them through like a table saw, it took 15 minutes by the time I plugged the router in, til I had the sheets on the floor to be joined, but I did get an extra pair of hands that were passing by at the time, to help me feed the sheets through.
Regards

Try Caporns Pty Ltd They might be able to help or redirect you.
(02) 9905-0661
Thanks Matt. I'll try grabbing a new blade first and see if that works out.
There's also a jig advertised in Wooden Boat that attaches to a planer. I've stayed clear of it so far, as it seems a tad pricey given what it is, but that seems like a possible option.
Will
Shoot me an email with your area and I can put you in contact with a customer who has a CNC machine that will do the scarf, or fingerjoint for you. Will be an easy process to right a program for the CNC or do a drawing that will convert to a program.
Regards
Steve
Checked out Google and found afew different sites for different scarfing jigs. Makes for interesting reading and ideas.
Haven't decided how I'll do mine yet.
http:/
http:/
http:/
Will have attached a jpeg, shows a scarf finger joint open that will give you the idea of what I was saying about
tricky
super strong as well. You can play around on the computer and change the angles, width of fingers, depth of fingers, how many you want etc. Only limit is that there must be a radias no smaller than the tool used where the hills meet the valleys (or peaks and troughs in sailing talk <img src=

alt=
/>) but that has the advantage of not being so fragile for transport and is better looking I think.How did you go with little Johnny from the factory?
Steve
hi Steve Talked to little Johnny and he was a bit worried when I told him that I had to stress the wood/joint to make the hull shape. He thinks it wouldnt be strong enough.
He gave a number of another person and he reckons an overlapping joint would do the same job and would be alright to stress.
Has anyone got any feed back with using an overlapping joint to join hulls.
regards
william
Hi Will
There is a bit of ifo on that web site I sent to you, also part of this post a bit further back that goes into some pros and cons for a lapped butt joint versus a scarf joint, may be of some help, in the mean time Ill do a bit of asking around.
Steve
Scarfing and joining 4mm ply is not so difficult. Get some pieces of scrap to try your hand with a belt sander and a sharp plane. With some practice you will do perfectly good scarfs. Lots of first time homebuilders have scarfed their ply before you, so just get going and do it. The hardest part is getting started.

I agree with Rolf here. The thought of doing the joint is worse than actually doing it. It's a relatively simple task to make a strong scarf joint. The key points are:
1. Make sure there is enough 'meat' in the joint. 8:1 is the minimum but go to 10:1 if you can.
2. Ensure that the mating faces are flat and the same angle
3. Ensure that the mating faces are free from dust and debris
4. Use a good quality stiff epoxy, correctly mixed by measuring (I include colloidal silica in the mix).
5. Don't use excessive pressure when joining the pieces so that they creep. Fixing to a bench with some way of gripping/holding the workpiece rather than the joint is good. You can then use light pressure to hold the vjoint closed.
Once done and cured, it's surprising just how much bending a scarf joint can take. On some of my early 2mm and 3mm test pieces it was the ply that failed a distance away from the joint rather than the joint!
just get out and do it. are you using 4mm or 3mm ply.
lay 4 sheets of ply, with best faces to each other. mark a line 24mm from edge of each sheet of ply, or 32mm if using 4mm ply. then line each piece up with line, and clamp tight to a bench, use a bit of scrap ply on top and bottom so as not to damage the edge of the good sheets. i also had to put a couple of nails in the midle of the sheet to hold it down tight. then use a hand plane to get most of the material down then use a long sanding block, to finish off with. get out in the shed and start building befor the sailing season is over.
Was thinking about using a circular saw to do the scarf cut.
Im building the boat for next season so Ive got a good 7-8 months to build it.