We all know hull de-lamination is a common problem on old cats and there is plenty out there on fixing soft spots with the "drill and fill method". But here, I wanted to discuss the feasibility/practicality of an alternate approach. I'm talking about pulling the deck from the hull in order to get all the access you need to re-glass soft areas, strengthen key structural areas, etc. I have two main points to discuss:
1. Separation - I don't think the hull and the deck (let's say on an old H16) can be separated easily. (Or can it? You tell me) So what I thought about doing is using two old cats to make one. Step 1 - Find two sets of full hulls. Step 2 - Pick a hull with a good deck and cut/sand away the rest. Step 3 - Pick a hull with a good bottom and cut/sand away the deck. Step 4 - Do any repairs on either. Step 5 - bond the rebuilt cap from the first hull with the rebuild bottom from the second hull. Step 6 - Repeat on the other side. How does that sound? Has anyone tried this or found any articles on it? Any other thoughts?
2. Bonding - Let's assume this was a "go", what is the best way to bond the deck with the hull?
Context - I know additional weight might be an issue but this is not meant to be a racing boat. Just a fun cruiser that would be most of all, solid. Also, I thought about this because I see so many old cats out there with soft hulls, sometimes people just give them away. And the "drill and fill" method is not meant to rebuild the entire hull. So I'm wondering how feasible is this?
They can be separated with a chisel, you will likely do plenty of damage, I did that to a laser one time and put it back together with epoxy. Far more work than its worth IMO
Thanks bacho. Thought about the chisel but like you said - too much collateral damage. But if I took two separate hulls and just kept the deck from one and the bottom from the other (not caring about the "other half" of each) I think I could cut/sand away the parts I don't need ( i.e. the "other half") failry quickly and without any major damage to the parts I want to keep... Just ideas in my head....
drill it, fill it, and sail it till she sinks

if the ole drill and fill didn't work so well i would consider it but i just works so well!!!
Here is what I learned and now am afraid of....
Last october I picked up my P16 and I was just about putting all my weight on palms pressing on the hulls...Rock solid.
last friday one push and crunch major delam. I'm not an expert but murphys law dictates that your solid deck will delam on the first sail after the cut over. So I know as soon as I finish paint my port hull will delam.
On the plus side drill and fill seemed to work and is pretty quick. Whats the worst that can happen; Catastrophic hull failure?

IMHO
I am sure it can be done. you can build a catamaran out of spam if you really want.... but that doesnt mean it should be.
too much time, energy and bleeding knuckles for a heavier boat that will surley.. delam in a new area.
And Bill has Driiled and Filled a few in his day. A bruski or two and drill away!!!
one thing i haven't tried yet is that west system in a caulk tube with the special gun that mixes the hardener and resin at the same time...just drill and gun the goo...no mixing or filling syringes...but a gallon of bondo/3m resin is only 30$, that's a lot of goo, the caulk tubes are 15-18$ i think. i need to inject my port hull where that fat azz skipper was sitting last saturday...if that knucklehead can't destroy his boat then you should be fine!...(oh wait, that's me i'm talkin' bout)
I used the drill and fill method last year on some rather large delaminated areas on my Prindle 18 with good results. However, on larger areas of delamination filling can lead to some seperation of layers of hull. I know some use a vacum appartus to prevent this but have recently read one preson recommending putting screws between layers and removing after resin sets then filling holes. Anyone have any experience with this technique to prevent hull seperation?

I ran into another problem this weekend. in fixing my soft spot. I had mistakenly drilled clear through in several spots. I was able to fix this easy enough by using a counter sink bit to widen the top a bit. I then brushed on some un-thickened Wests epoxy in each widened hole then added some 406 to thicken the rest and kind of puttyed it into the holes with the Wests mixing stick. This work pretty well I happy with it.
The problem was when I continued to work on the repair and got to injecting I could not seem to get anywhere. I was trying a couple syringes from the farm store. one had to use an adapter to get to the size I needed the other did not. The adapter one did not work out so well so I quickly switched and it was better but I really did not feel like the epoxy was going anywhere. I started towards the center so it could work out towards the outside an use those as breathers. I figured I maybe that one would not go so moved on to another but really did not have any better results.
I eventually quit and scraped off and cleaned up the goops on the masking tape as best I could so it did not make it to hard to sand later but I most of it undone.
Maybe I need to look at a little more hard core repair here. I considering just sanding it down ot the glass and putting a couple more layers on top the deck. This is an old boat it has had many repairs and was pretty much given to me so I plan to try to do anything myself. i do not want to sink a ton into it just get it safe to sail. If I can do that I'll consider beautifying it later.
The syringes I found that work pretty good are the "feeding tube" syringes where medical people put the liquid supplement directly into the patients belly through a tube. Mine came from a drug store and had an adapter that I used but had to shorten the tip so it wouldn't hit the inside layer of glass. Are you sure you weren't bottoming the tube out in the inside layer of glass? I couldn't get anywhere with injecting it till I cut the tip off short enough for the shoulder of the syringe tip to rest on the outside layer and the open tip just under the surface.I also started at the outer edges of the soft spots and worked my way to center.
Edited by dtfuqua on Apr 18, 2012 - 08:52 AM.
dtfuqua wrote: Are you sure you weren't bottoming the tube out in the inside layer of glass? I couldn't get anywhere with injecting it till I cut the tip off short enough for the shoulder of the syringe tip to rest on the outside layer and the open tip just under the surface.
When you cut the tip, do it at an angle so even if you do bottom out, you can still inject the goo. It will also give you some ability to direct the flow, so be sure to spin the syringe as you squeeze to get maximum delivery in the space.
Quarath wrote: n
Maybe I need to look at a little more hard core repair here. I considering just sanding it down ot the glass and putting a couple more layers on top the deck. This is an old boat it has had many repairs and was pretty much given to me so I plan to try to do anything myself. i do not want to sink a ton into it just get it safe to sail. If I can do that I'll consider beautifying it later.
Dustin, I dont think that will work from a structural standpoint.
I had similar issue whit resign going nowhere but when I applied a good amount of pressure I was able to force it between the glass and laminate and get it to come out of the surrounding holes. I had my drill depth set to just break the firs layer of glass then I went back with the drill bit in HAND and cleaned out each hole manually. Took a while but I knew I wan' too deep. (that's what she said)
I was using the west syringes and they were a PITA cuz they were small but I had several holes close together and it worked out. Check out my pics on the FB page.
dtfuqua wrote: The syringes I found that work pretty good are the "feeding tube" syringes where medical people put the liquid supplement directly into the patients belly through a tube. Mine came from a drug store and had an adapter that I used but had to shorten the tip so it wouldn't hit the inside layer of glass. Are you sure you weren't bottoming the tube out in the inside layer of glass? I couldn't get anywhere with injecting it till I cut the tip off short enough for the shoulder of the syringe tip to rest on the outside layer and the open tip just under the surface.I also started at the outer edges of the soft spots and worked my way to center.Edited by dtfuqua on Apr 18, 2012 - 08:52 AM.
That may be the case I'll chop it down some and give it a try.
klozhald wrote: [quote=dtfuqua]Are you sure you weren't bottoming the tube out in the inside layer of glass? I couldn't get anywhere with injecting it till I cut the tip off short enough for the shoulder of the syringe tip to rest on the outside layer and the open tip just under the surface.
When you cut the tip, do it at an angle so even if you do bottom out, you can still inject the goo. It will also give you some ability to direct the flow, so be sure to spin the syringe as you squeeze to get maximum delivery in the space.
Also a great tip I never heard and should have thought of.
X2 on the angle cut
Tried a bit again last night. Hard to say how it went. I mostly just worked in the area where the I had already had issues so it is hard to say. The shorter angled nose does seem to be better but still getting a lot coming back onto the deck since my holes are not as tight on the syringe as they were originally.
Worst case and put in one of these and use the hole to make some nice solid bulkheads on either side.
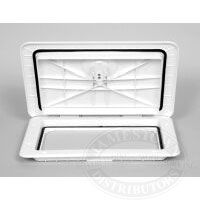
Quarath wrote: Worst case is put in one of these and use the hole to make some nice solid bulkheads on either side.
Nice!
It looks like you could load the hull a six-pack at a time.
Do they have a model with a bottle opener in the lid?
Want two!
😀
I did see some with drop in liners that could be used to store stuff in. If you built in around where that goes in with something to act as a insulator it might work pretty good as a cooler. I'd be happy with the storage though.